 |
open_Netcenter Forum |
   |
| Autor | Thema: Install TwonkyMedia UPNP media server |
|---|---|
|
Mike Administrator  ID # 1 |
 Erstellt am 13. März 2007 22:09 (#1)

 Zitat Zitat
 PN PN  E-Mail E-Mail
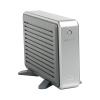
How To Install TwonkyMedia UPNP media server on the WD Netcenter NAS hard drive
THIS WILL VOID YOUR WARRANTY - YOU DO THIS AT YOUR OWN RISK Credit here goes to the following German website for the software links and instructions: http://www.brennwertheizung24.de/wdncforum/index.php?mode=viewthread&forum_id=13&thread=4&z=last&sid=d26e3835a0cc798444fef15b1746cb73 As a Linux newbie, its taken me a while to figure out what the instructions mean and translate them into English via Google. So here is something of an idiots guide: First of all you need to update your NetCenter with telnet enabled firmware from epias; you can get it from the following link: http://members.lycos.nl/epias/netcenter/ Treat it just like a manufacturers upgrade, using the Netcenter configuration web-page to do a Firmware upgrade You can now access the Netcenter via telnet; if you have windows XP on your PC then you do it as follows: From the windows start button select Run then type telnet into the dialog box and click OK. You should get a black DOS window with Telnet > for a prompt Type o 192.168.0.2 (or whatever is the IP address of your Netcenter drive) note the space after the lower case o At login: prompt type root At Password: prompt type WD_NetCenter You should now have a # for a prompt Now, to create new directories for the libraries, type the following, noting the spaces, and press return after each line: (or cut and paste them from here) mkdir /shares/Main/__opt mkdir /shares/Main/__opt/lib mkdir /shares/Main/__opt/bin mkdir /shares/Main/__opt/etc ln -s /shares/Main/__opt /opt Note that if you get no message then the above have been successful. You can type ls al to look at a directory listing if you want. Then type vsftpd and press return. This starts the FTP server software on the Netcenter, after this the black DOS window will be unresponsive, but keep it open. Next you have to copy the files from ipkg package provided by mafe, first download the zip file from here: ipkg_NetCenter unzip it to a convenient directory on your PC. Next you need to copy the files via FTP, I did this the easy way by downloading and installing the free SmartFTP2.0 software tool from here:http://www.smartftp.com/ Once installed, take a couple of minutes to do the free online tutorials and you should be flying. To copy using SmartFTP you just drag and drop the files from your unzipped ipkg directory to the following directories on the Netcenter: Copy these files libipkg.a libipkg.so.0.0.0 libipkg.la libpthread.so.0 into the newly created directory: /shares/Main/__opt/lib Copy file Ipkg-cl Into: /shares/Main/__opt/bin Copy the file ipkg.conf into: /shares/Main/__opt/etc Now you need to go back to your telnet DOS window, close it, open a new one and log in to your Netcenter via telnet once more (password etc.) Then type the following, noting the spaces, and press return after each line: cd /opt/lib ln -s ./libipkg.so.0.0.0 libipkg.so ln -s ./libipkg.so.0.0.0 libipkg.so.0 Next download the TwonkyMedia package for max gate Shared STORAGE plus from: http://www.twonkyvision.com Unzip it into another convenient directory on your PC. Before you launch the NASSetup.exe you have to edit the file "install.nas" - which is in the same directory as the NASSetup.exe. You must use a Linux compatible editor like the free Notepad++ Edit it to look like this: ID=WD-NetCenter USER= PWD= DIR=/shares/Main/__twonkyvision RC=/shares/Main/__opt/etc/init.d/S99twonkyvision REBOOT Then run NASSetup.exe. Youll get some messages but hopefully no error messages. Go back to your Telnet window and type, or cut and paste, in the following, pressing return after each line: export LD_LIBRARY_PATH=/lib:/usr/lib:/opt/lib /shares/Main/__twonkyvision/twonkymedia You should get a Twonkymedia 4.1 message which indicates success !!!!!!!!! Once this is running open a web browser and type the following into the address line: http://192.168.0.2:9000 (replace with the IP address of your NetCenter) You should get the Twonkymedia configuration page where you can setup all your media directories on the NAS drive etc etc. (keep this page open) This configuration page should all be fully functional but its not over yet we still need to create a folder for your database and make TwonkyMedia auto start on power-up. So logon to the NetCenter via Telnet once more and type vsftpd, then open SmartFTP again. Using SmartFTP make a new db folder here: /shares/Main/__twonkyvision/db (You can do this by right clicking on the twonkyvision folder to get a context menu) Now go into the Miscellaneous tab in the Twonkymedia configuration web page and edit the media Server Database Directory and cache directory to : /shares/Main/__twonkyvision/db/twonkymedia.db /shares/Main/__twonkyvision/db/twonkymedia.db/cache Now create a startup file with notepad++ which looks like this: #!/bin/sh route add -net 224.0.0.0 netmask 240.0.0.0 dev eth0 export LD_LIBRARY_PATH=/lib:/usr/lib:/opt/lib /shares/Main/__twonkyvision/twonkymedia Then save it on your PC under the name rc.start Then copy it to the NetCenter to the directory: /shares/Main/__opt/etc Now right click on the file in SmartFTP and select properties/CHMOD, then tick the three boxes which say Execute Now you should find that if you power The NetCenter off and on the Twonkymedia server is running and fully functional. It should work with lots of UPNP media players I am using it with a Netgear MP101 currently. TwonkyMedia serves music, radio, video and pictures. Dont forget to license it (29 euros) Cheers & Good luck Martin THIS WILL VOID YOUR WARRANTY - YOU DO THIS AT YOUR OWN RISK p.s. Check out the forum on the original website for yet more things you can do with your NetCenter, if your German is good: http://www.open-netcenter.de/ And if its not here is a Google Translated link: http://translate.google.com/translate?u=http%3A%2F%2Fwww.wd-netcenter.de%2F&langpair=de%7Cen&hl=en&ie=UTF-8&oe=UTF-8&prev=%2Flanguage_tools zur Verfügung gestellt von Martin |
Beiträge: 179 | Mitglied seit: Juli 2006 | IP-Adresse: gespeichert |
| |
| open_Netcenter Web - Infos, Handhabung, Anleitungen | Boardregeln
Tritanium Bulletin Board 1.6
© 2010–2014 Tritanium Scripts